Complete Guide & Tips for Using Self Levelling Compounds
Posted by Pure Adhesion Limited on 14th Jan 2025
Self-levelling compounds are an excellent way to create a smooth, even surface on floors before laying tiles, vinyl, laminate, or other flooring surfaces. Here are some tips for using self-levelling compounds effectively.
PREPARATION
- Choose the Right Levelling Compound: Self-levelling compounds are available in several types e.g. for various levels of unevenness, interior use, exterior use, flexible, and re-enforced. Select one suitable for your project. The two best levelling compounds covering all bases are the Mira X Plan, and the Ultra Tile Pro Level Renovate
- Clean the Surface: Ensure the surface is free of dust, dirt, grease, and other contaminants. This ensures proper adhesion.
- Repair the Base: Patch any cracks or holes in the subfloor using a suitable filler. Large voids can cause the compound to pool unevenly.
- Prime the Surface: Apply a primer specific to the self-levelling compound you are using. This promotes adhesion and prevents moisture from being absorbed by the substrate. An example of a really good all round primer is the Ultra Tile Pro Primer, available in 1 Litre and 5 Litre quantities.
- Seal Gaps: Seal gaps around the edges of the floor and any holes where the compound might leak through.
MIXING
- Follow Manufacturer's Instructions: Use the correct water-to-compound ratio as stated on the packaging. Too much or too little water can weaken the mix.
- Use the Right Tools: Mix the whole bag in a large bucket using a heavy-duty drill or mixer, with a paddle attachment. Mix until it is lump-free. Most mixing paddles with work, but a bird cage mixing paddle is designed specifically for levelling and smoothing compounds.
- Work Quickly: Self-levelling compounds can set fast, so mix only what you can apply in the recommended working time (usually 20–30 minutes). Use foam dividers to split rooms into more managable areas. Mira Planstop is perfect for this purpose.

APPLICATION
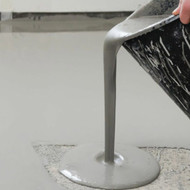
- Pour in Small Sections: Start pouring the compound at the lowest point and allow it to spread naturally. Use a trowel or float to help guide it.
- Use a Spiked Roller: A spiked roller helps remove air bubbles and ensures an even finish. Roll gently while the compound is still wet.
- Control Thickness: Check the product’s specifications for recommended thickness and use a screed or depth gauge to maintain consistency.
DRYING AND FINISHING
- Allow Proper Drying Time: Give the compound sufficient time to cure fully before walking on it or installing flooring. Curing times vary by product but are typically 24–48 hours.
- Maintain a Stable Environment: Ensure the room temperature and humidity levels are within the manufacturer’s recommendations to avoid cracks or improper curing. Avoid draughts to prevent uneven curing.
SAFETY TIPS
Wear Protective Gear: Use gloves, safety goggles, and a mask while mixing and applying the compound.
By following these steps, you will achieve a professional-looking result and a solid base for your flooring.


