Step By Step Guide To Using Jolly To Fill Cracks Chips & Holes In Tiles & Stone
Posted by Pure Adhesion Limited on 28th Nov 2024
Using Jolly Stone Filler is straightforward, and it is typically used for filling cracks, chips, or seams in natural stone such as marble, granite, or engineered stone. Here's a step-by-step guide:
Materials and Tools Needed:
- Jolly Stone Filler Colours and Sizes Ensure it's the correct shade for your application.
- Additional Hardener For Jolly: Comes with the filler to set it properly.
- Jolly Applicator Set: For spreading and leveling the filler.
- Sandpaper or Polishing Pads (optional): For finishing the surface if required
- PPE Latex Nitrile Gloves To protect your hands.
- Masking Tape: To protect adjacent areas.
Step-by-Step Instructions:
- Prepare the Surface:
- Clean the surface of the stone to remove dust, grease, or debris.
- Ensure the area is completely dry before applying the filler.
- Mix the Filler and Hardener:
- Take a small amount of the Jolly Stone Filler on a clean, flat surface.
- Add the hardener in the recommended proportion (usually a pea-sized amount for a golf-ball-sized filler, but check the product instructions).
- Mix thoroughly until the colour and consistency are uniform. Work quickly, as the filler will begin to set in a few minutes after mixing.
- Apply the Filler:
- Use a spatula or applicator knife to apply the filler into the crack, hole or chip.
- Press it firmly to ensure it fills the void completely and adheres well.
- Level the surface by scraping off excess filler with the spatula.
- Allow it to Set:
- Let the filler cure for the time specified on the product label, typically 30-45 minutes, depending on the temperature and humidity.
- Finish the Surface:
- Once the filler is hard, use fine-grit sandpaper or polishing pads to smooth it out and blend it with the stone surface. This step is often not required if a good enough finish has been achieved when flattening the filler out during application.
- Clean the area again to remove any residue.
- Optional Polishing:
- If the stone has a polished finish, use a polishing compound or stone polish to restore the shine.
Tips:
- Work in small batches: The filler sets quickly after mixing with the hardener.
- Test the colour: Before application, test the mixed filler on a hidden area to ensure it matches the stone.
- Protect surrounding areas: Use masking tape to avoid smearing filler on adjacent surfaces.
By following these steps, you can achieve a seamless and professional-looking repair using Jolly Stone Filler.
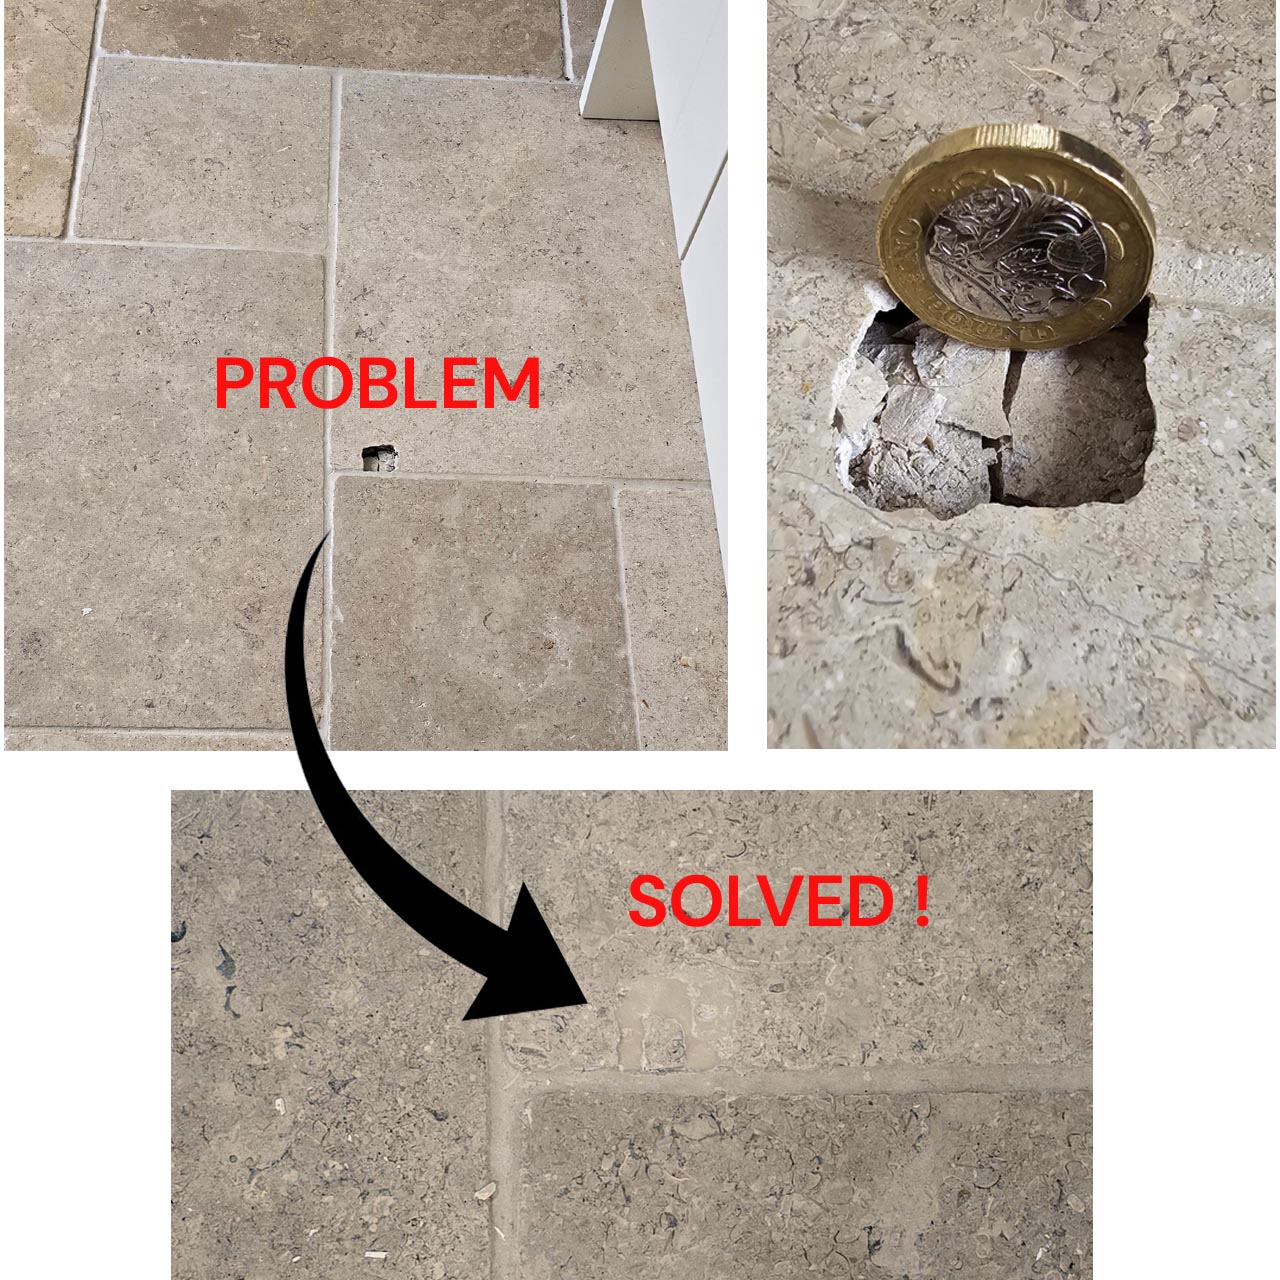
The picture below shows a before and after. The colour used here is straw, and in this instance the customer went one step further which was to press a stone chip, from a spare tile, into the wet Jolly so it perfectly disguised the repair. The matching stone chip is glued into place by the Jolly, which has also filled the void behind it. Top marks for this repair!!
The customer commented.
" Great product and the shade is spot on. And quick delivery too. It was a good tip of yours to use the bit of stone.Thanks for all your help.Hopefully I won't need to use you guys again (in the nicest possible way). "


